Like Us Like Us Facebook Subscribe Subscribe us YouTube Whatsapp Share us Whatsapp Query Send your queries

Linux How many packages are installed ?

Linux How many packages are installed ?

In this tutorial we are going to use Linux terminal to find how many packages are installed on your computer. In today’s world a systems are made up of hundreds, even thousands of packages. Generally these package are tracked and maintained by a package.

Here are the commands for checking the number of installed packages on various distro :

For Debian based distro (Ubuntu, Kubuntu, Xubuntu… , elementary os, Zorin, Linux Mint, Deepin, MX Linux ….)

Open Terminal and run command below

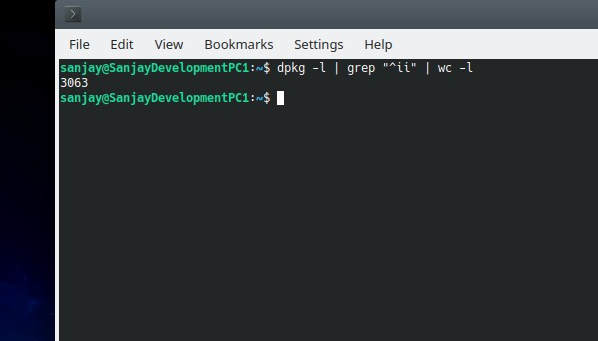
dpkg -l | grep "^ii" | wc -l

For Redhat based distro (CentOs, Fedora, clear os, OpenSuse …)

Open Terminal and run command below
rpm -qa | wc -l

For Arch based distro (Manjaro, Garuda Linux, EndeavourOS, RebornOS, Chakra Linux …)

Open Terminal and run command below

pacman -Q | wc -l

Output Screen shot for Linux How many packages are installed ?

Linux Packages

Detecting Ubuntu and its version using NodeJS in Linux

Detecting Ubuntu and its version using NodeJS in Linux

In Linux we can detect ubuntu and its version like Ubuntu 18.04.4 LTS using Linux command “lsb_release -a | grep Description”, using nodejs child_process we can easily run Linux command and detect Linux version.

Code to detect Ubuntu and its version using Nodejs in Linux

The blow code is tested on Node JS Version : 12.4.0

/* by Sanjay Prasad */
const { exec } = require('child_process');
exec('lsb_release -a | grep Description', (err, stdout, stderr) => {
if (err) {
console.error(err)
} else {
console.log("stdout" +stdout.slice(12));
console.log(`stderr: ${stderr}`);
}
});

USSD base balance check on Linux using datacard

USSD base balance check on Linux using datacard

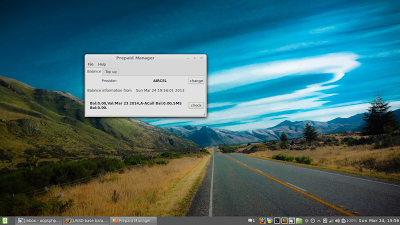
If you are Indian Data card user, having data card of micromax, beetal,huwai,zte we have always option to check your balance on windows OS as they provide software for that but what about Linux. I accept the pleasure of using that software is quite awesome but still we can check our data card balance on linux using a free app called Prepaid Manager.

Linux Prepaid Manager

First Install Prepaid Manager. Installing will not let you to use these app. You have also install a configuration file in which all settings are there called serviceproviders.xml

First Install libxml2-utils
sudo apt-get install libxml2-utils
if faile use command su instead of sudo.open file manager in admin mode
sudo nautilus
or sudo namo …..

whatever your file manager is
and search for serviceproviders.xml open in text editor
look for your service provider.
where to search this file
/user/share/mobile-broadband-provider-info/

First Look for your operator like Aircel, Vodafone, Relaince …..

Example of Aircel
and add before <apn></apn> tag<balance-check>
<ussd>*125#</ussd>
</balance-check>

<balance-top-up>
<ussd replacement=”CODE”>*130*CODE#</ussd>
</balance-top-up>

Save the file and use Prepaid manager software.


Installing Xampp 1.8 on 32 bit and 64 bit linux and solve phpmyadmin Access error

Installing Xampp 1.8 on 32 bit and 64 bit linux and solve phpmyadmin Access error

What is Xammp ?
XAMMP is now become number one choice for web developer for its ease of use and stability. XAMPP is an easy way  to install Apache distribution containing MySQL, PHP and Perl.
In this tutorial I am going to share how to install Xampp 1.8 on 32 bit and 64 bit linux and solve phpmyadmin Access error. In previous tutorial I already shared xampp 1.7 installation guide .First Download Xampp 1.8 from apachefriends and copy it to home directory and rename it to xampp1.8.tar.gz. If you run 64 bit OS install Wine or ia32-libs otherwise you will not able to enjoy xampp as it is 32 bit application.

Installation guide of xampp 1.8 :

Run terminal and use following command
sudo tar xvfz xampp1.8.tar.gz -C /opt
if fails use
su tar xvfz xampp1.8.tar.gz -C /opt
Now xampp install successfully in /opt/ folder. we can start xampp by simply by command
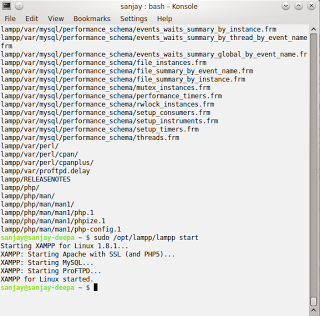
sudo /opt/lampp/lampp start

Xampp 1.8 installation

launch the url in firefox localhost but when launching phpmyadmin you will get following error.

xampp 1.8 phpmyadmin error

Don’t worry We will soon solve this error . But first we have to make /opt/htdocs/ writable so we can easy create folders and files there by following command
sudo chmod 777 -R /opt/lampp/htdocs
Now  we have to solve phpmyadmin Access error by simply editing httd-xampp.conf file.
Open terminal and run command
sudo kate
or sudo following by your favorite editor like gedit to open as root.
and open file httd-xampp.conf located at /opt/lampp/etc/extra/httd-xampp.conf
Look for following lines
<Directory “/opt/lampp/phpmyadmin”>
AllowOverride AuthConfig Limit
Order allow,deny
Allow from all
</Directory>
and replace with following
<Directory “/opt/lampp/phpmyadmin”>
AllowOverride AuthConfig Limit
Order allow,deny
Allow from all
Require all granted
</Directory>

After this , you will not able to open phpmyadmin same error will displayed on browser.
We have to restart Xampp in order to work. use following command
sudo /opt/lampp/lampp stop 
to stop xampp and
sudo /opt/lampp/lampp start
to start xampp 1.8

or you can use simgle command to restart
sudo /opt/lampp/lampp restart

Open localhost/phpmyadmin , after changing default language to english
it will look like

PHPMYADMIN xampp 1.8

Now watch complete video tutorial Install laravel,lumen on xampp only on Linux

This tutorial is tested on Linux Mint KDE 14 Nadia.
@https://plus.google.com/111215709458999120537

Ubuntu 12.10 failed to impress people

Ubuntu 12.10 failed to impress people

I am a big fan of Ubuntu using since it launched 6.04 till ubuntu 12.10 64 bit. It always gave something interesting  and innovative. The biggest plus point of ubuntu is its stability and speed and Linux each and every distro secure. But the experience that I got from 12.10 is pathetic.System Tested
Acer Emachine
2.13 GHz Dual Core
4GB DDR3 RAM
OS – Ubuntu 12.10 64 bit

Installation 
Booting from Live USB (763MB) was a awesome experience better than 12.04. Installation went smooth and took around 15 minutes to install. Desktop was responsive but not as 12.04.
Updated Software Sources , then install Gnome 3 Shell and after reboot I was back to my favourite Gnome default desktop it was responsive compare to unity desktop. By default you will find a power off option so shut down and restart become easy.

Ubuntu 12.10 and its Problems
Package Selection- distro comes in 763MB iso but didnot provide GIMP or Cheese.
Software Install issue – You will not able to run 32 bit application as Ubuntu 12.10 not ready to install Wine.
As it has some dependecy issues installing ia32-lib
sudo apt-get install ia32-lib
also fails gives output

Unable to correct problems, you have held broken packages.

So you will not able to install Wine 1.5/1.4 , XAMPP (PHP MySQL Development).

Media Playback
After installing flash and necessary codecs everything runs smooth and experience was good.

Conclusion : Unity Desktop was not mature compare to Gnome 3 default desktop, user interface was average on unity, You will find not able to install some software  , I will recommend OpenSuse 12.2 Gnome , Linux Mint Mate ,stick back to ubuntu 12.04 or wait for ubuntu next release.

Install XAMPP on 32/64 bit Linux Distro

Install XAMPP on 32/64 bit Linux Distro

Today Linux has become number one choice in Open Source world whether it is Desktop experience, programming, server or Web Development Linux has no match. Its Secure , fast and comes in many flavor.
In this tutorial we will focus how to install Xampp on linux 64 bit OS. Earlier day the Linux version of XAMPP called as LAMPP. But it comes as XAMPP with more improvements.
For Installing and running XAMPP on 64 bit linux distro install wine through package manager , it will install 32 bit packages so you can run  32 bit application also. Please note that  XAMPP is till now a 32 bit application. After installing Wine Download XAMPP  latest version from
After downloding Xampp copy it to home folder, and rename it to xampp.tar.gz
Note : Some distro allows root login such as PCLinuxOS, OpenSUSE so if your distro allows root login then logged as root. Some distro doesn’t allow root login like Ubuntu, Kubuntu … don’t worry login as default.
Go to a Linux shell and login as the system administrator root
su tar xvfz xampp.tar.gz -C /opt
or if fail try
sudo tar xvfz xampp.tar.gz -C /opt
it will ask password , use your root password and hit enter.
To start XAMPP simply call this command:
sudo /opt/lampp/lampp start
or
su  /opt/lampp/lampp start
You should now see something like this on your screen:
Starting XAMPP 1.7.7…
LAMPP: Starting Apache…
LAMPP: Starting MySQL…
LAMPP started.
Ready. Apache and MySQL are running.
Just type in the following URL at your favourite web browser:
http://localhost
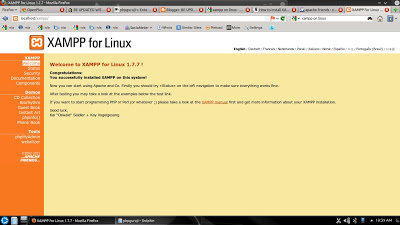
Now you should see the start page of XAMPP containing some links to check the status of the installed software and some small programming examples.
xampp 64 bit linux
Xampp on Kubuntu 12.04 64 bit
Now watch complete video tutorial Install laravel,lumen on xampp only on Linux  Some Usedful commands to remeber while playing with xampp.
startStarts XAMPP.
stopStops XAMPP.
restartStops and starts XAMPP.

This tutorial tested on Ubuntu, Linux Mint ,OpenSUSE and Fedora